
Gallery walls or collage walls are meant to be personal, there is no right or wrong way to do it. Some are minimalistic with similar toned photos that feature a clean symmetrical grid. Some are eclectic with a variety of pieces, colors, textures, and sizes with an off-set grid or non-symmetrical layout. We asked one of our senior designers, Jessica, for some tips on creating the perfect gallery wall. . . here’s what she had to say.
Gallery walls can feature so many different types of art, photographs, or wall décor pieces of different sizes and orientations, so have fun creating the perfect gallery wall that is right for YOU!
Selecting the Best Pieces
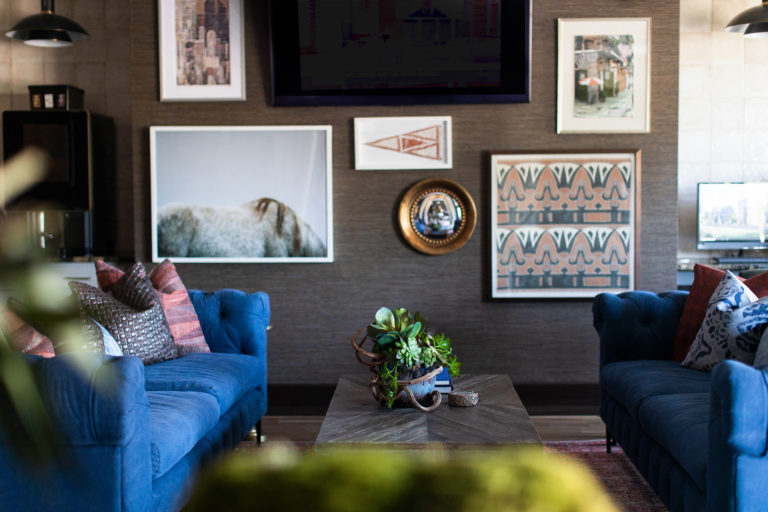
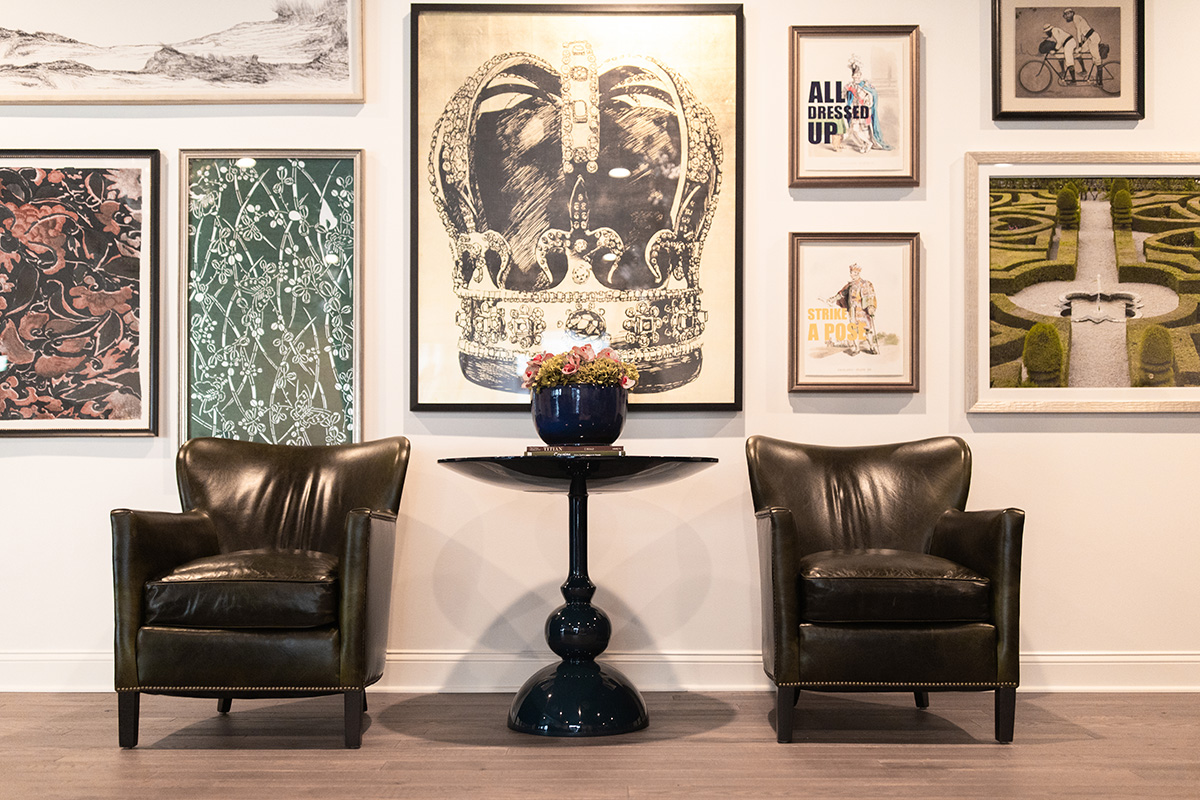
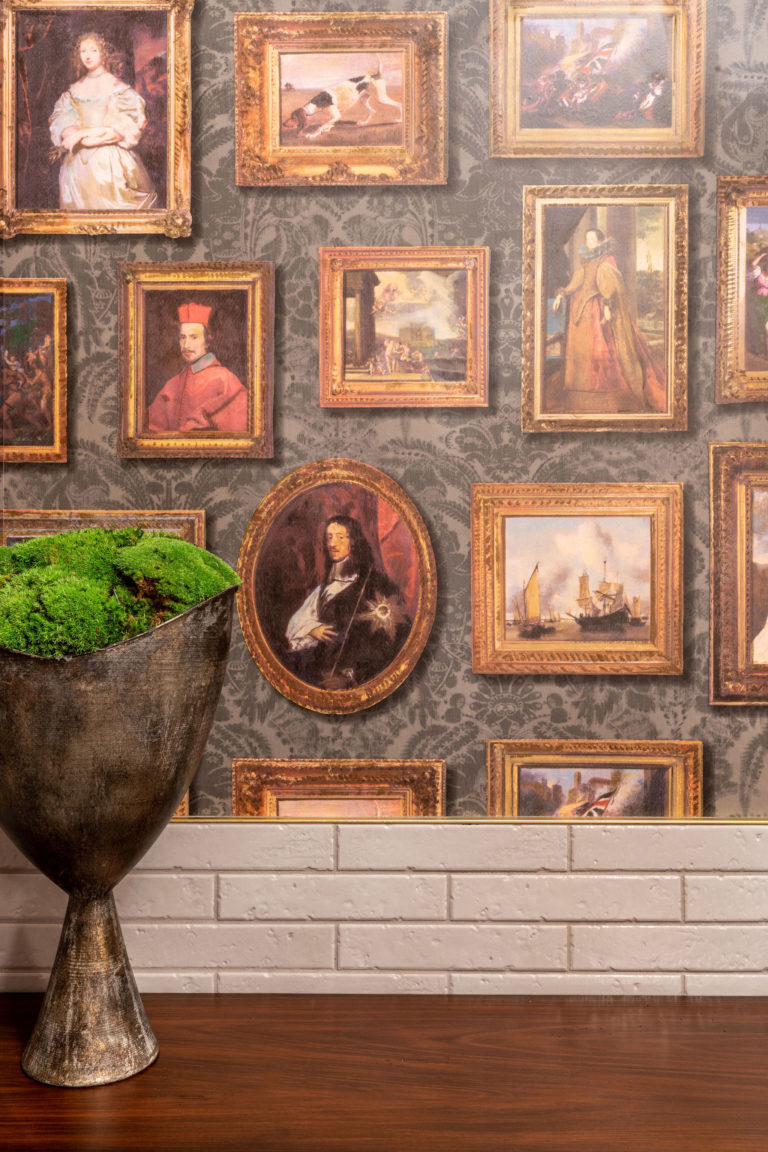
Use a combination of different scaled pieces. Play with larger pieces as more “focal” pieces with the smaller pieces highlighting or accenting the larger pieces. For example, the large pieces I use go with more of a neutral color scheme or theme (something timeless and classic) and then the pops of color and theme or design trends (more personalized or unique).
Repeat colors throughout different pieces; not every piece has to be the same color tone/palette. If you want to include an accent color or a “pop” of color, be sure that your color of choice is repeated at least 2 or 3 times throughout the entire gallery wall.
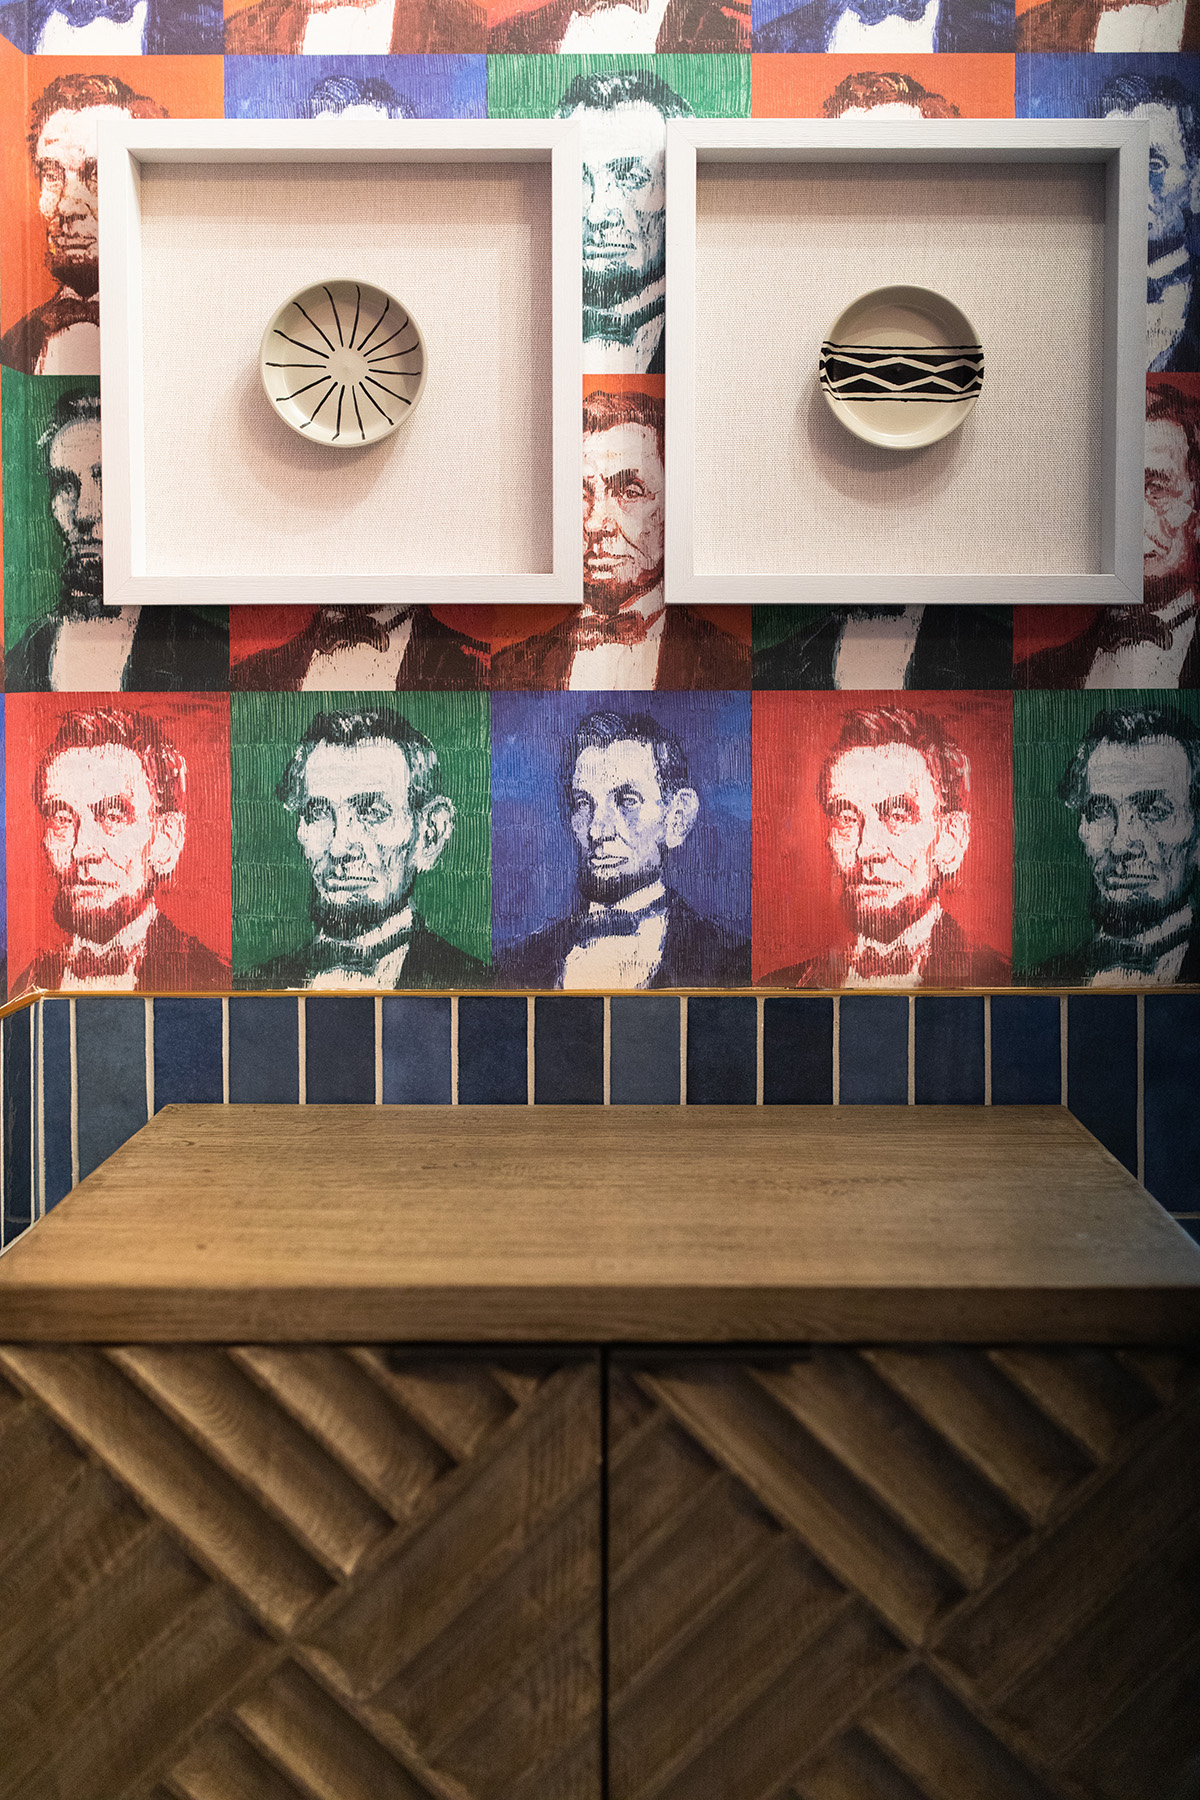
For an eclectic layered look, use frames with different finishes, colors, textures, and materials. From chunky ornate brass frames to skinny matte black metal frames to natural wood frames…
Photos mixed in with pieces of artwork or wall decor pieces (Landscapes, giclée’s, acrylic paintings, mirrors, woven pieces, clocks etc.) create an eclectic, layered gallery wall look of collected items both old and new.
PRO TIP: If you choose to incorporate family photos, select photos that match the palette of the rest of the gallery wall artwork or opt for black and white prints that work with any palette.
Plan Prior to Hanging
- Measure the space you are wanting to cover with the gallery wall
- Collect the items you want to use in the gallery wall and find an open space/table to lay everything out
- Play with different combinations of how it would look on the walls – don’t be afraid to emphasize scale and proportions!
- Have fun with the orientation, in addition to the scale/size of the pieces
- Play with having photos/artwork with horizontal and vertical orientation
PRO TIP: The largest piece doesn’t have to be centered on the wall; it could be used on one side while a collection of smaller pieces helps to balance it out on the other side.
Hanging
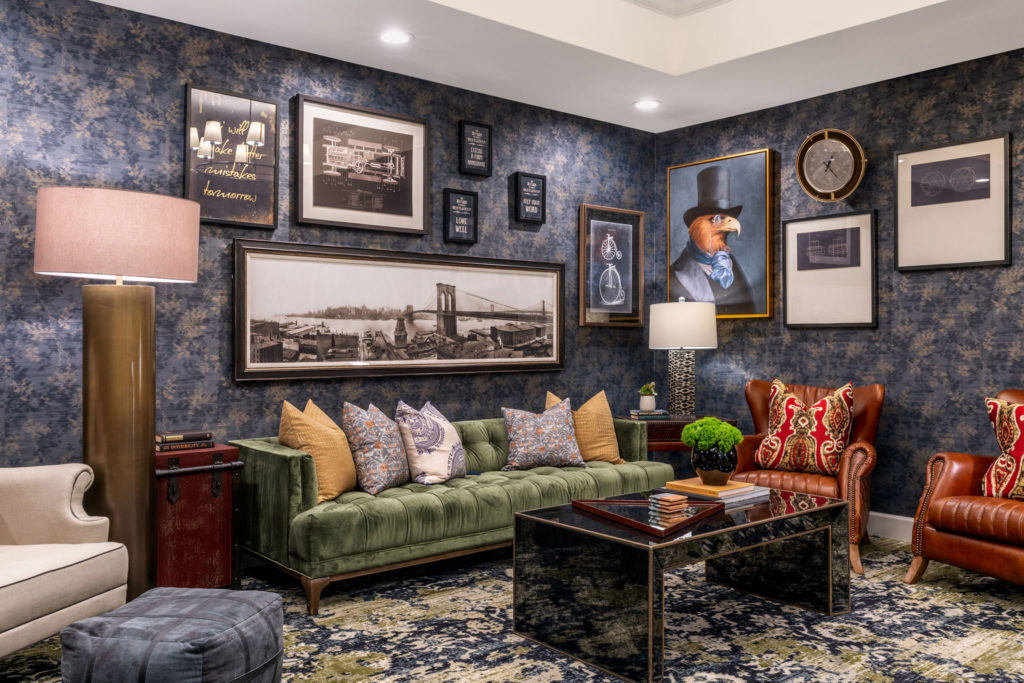
Don’t space things too far apart or too close together. Our general rule of thumb is between 1.5-2 inches. Place the largest piece(s) first, then fill in around them with the smaller pieces.
Keep lines in mind. Not everything has to line up perfectly, but having a few pieces that create a visual vertical or horizontal line is helpful to make the gallery wall feel balanced appropriately
PRO TIP: Always have a tape measure and a level handy!
Have fun with your project and enjoy the end result of your creativity!
As interior designers, we want to connect your personal connection with the designs you love by implementing them into the story of your home. You don’t have to look far as we can help you with your high-end residential design needs. If you’re interested in remodeling or renovating any room in your home (or the whole thing!), get in touch with us. We would love to hear about your project and how we can make your space and life more beautiful.