Have you ever wondered what it’s like to hire an interior designer? Or have you worked with a designer before, but wondered what goes on behind the scenes? We’re taking you behind the scenes in our blog series, The Life of a Design Project! In this four part series, follow along as we take you from the Design Concept phase of a residential project, all the way to Install Day!
For the project we’ll be following in this series, the clients are remodeling their basement, furnishing multiple rooms in their home, remodeling their powder room, and putting in new window treatments throughout the home. They also have a great room with a unique design challenge: the room is open and airy with walls that are, floor to ceiling, 20 feet tall and completely bare. The lead designer on their project is Jessica Jones!
In this month’s installment, we’ll show you all that goes into the construction phase of a project!
Make sure you’ve read our previous post about the Selections phase!
Creating the Construction Plan
Jessica’s first step to facilitate the construction phase was to create elevations in AutoCAD of what she wanted to accomplish in the construction phase. From there, she could get price estimates, and then, construction could begin. In this project, the majority of the construction took place in the great room and the basement.
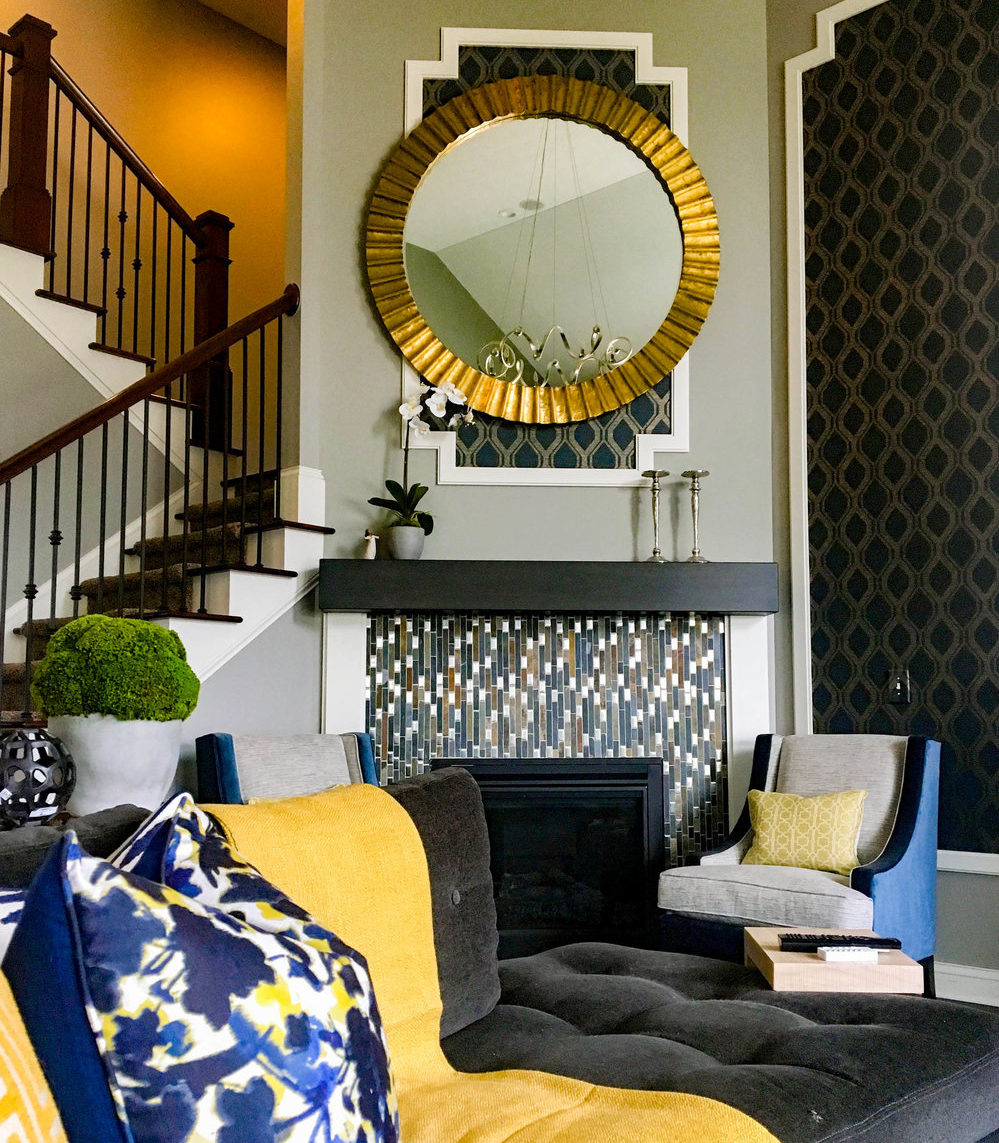
The client had a fireplace that was flush with the wall, and a 8 inch deep mantle that “bumped out” and made the fireplace look smaller than it actually was. Together with the client, Jessica decided to update the fireplace, without undertaking major construction, by replacing the existing mantle with a more narrow mantle that was more flush to the wall and matched the character of the fireplace. She also decided to frame the fireplace with paneling to make it appear wider.


The great room’s completely bare, 20 foot walls needed an update to match the client’s glam aesthetic. Jessica created a design that included adding panels and then wallpapering within those panels. She created elevations that reflected that design and reached out to our wallpaper installer to go over what this project would require. The wall paper installer would need to very precisely cut the paper, match the paper’s pattern across the panels, and work very closely with the wood panel and millwork installer, Westwood Cabinetry.
After Jessica sent Westwood Cabinetry her elevations, they created their own drawings and mockups of the millwork and paneling for her to approve.


In the basement, the clients wanted to create an accent wall on which they could place their entertainment center. Jessica reached out to our woodworking vendor, David Schlabach of Schlabach Woodworks and described what the client was looking for. He began by sending Jessica samples of wood, finishes, and drawings of what the finished wall would look like. He also sent Jessica samples of wood and mockups for the great room’s new fireplace mantle.


Organizing the Team of Subcontractors
After Jessica had reached out to all of the subcontractors with elevations and received their pricing, she set a meeting for each to come to the client’s home for an onsite construction meeting. At these meetings, the subcontractors took field measurements and helped Jessica and our project manager determine the timeline of work. These meetings also served as a time for the subcontractors to meet and coordinate their schedules.
The millwork in the great room had to be completed before wallpapering could begin. The dining room also required wallpapering and mill work. So it was determined that millwork would begin in the great room, then move to the dining room, and wallpapering would begin in the dining room and end in the great room.
Ideally, all construction would happen simultaneously to keep the project on time and on budget.


Construction
Once all of the subcontractors’ drawings and samples had been approved, construction could begin. Jessica and our project manager worked with the client to ensure that they felt comfortable with the subcontractors being in their home. On some occasions, our project manager stayed on site to oversee the work and to keep everything on track.
Towards the end of the construction phase, R & T Yoder Electric arrived to install the focal point of the great room: the chandelier!
The construction phase of any project relies heavily on the coordination and organization of the lead designer, project manager, and our excellent subcontractors.
Join us for the next edition of this series in which we’ll take you behind the scenes for the final phase of the project: Installation!!
Interested in working with us on your project? Send us an email at hello@crimsondesigngroup.com!